Structural Insulated Panels (SIPs) are making waves in modern construction. If you're building a home or light commercial space, these panels can speed up the timeline, boost energy efficiency, and reduce labor needs. But before diving into the installation process, it's smart to know what you're signing up for.
This guide walks you through what to expect, from delivery day to final inspection. It’s everything you need to feel ready, confident, and a step ahead.

Understanding the Basics of SIP Construction
SIPs consist of a foam core sandwiched between two rigid boards, usually oriented strand board (OSB). This integrated building system combines structure and insulation, making it incredibly strong and highly energy-efficient.
They replace traditional framing and insulation in one step. That means fewer materials, fewer labor hours, and tighter building envelopes. SIPs are common in homes, schools, small commercial buildings, and even tiny homes.
Expect excellent thermal performance, high structural integrity, and less waste on site.
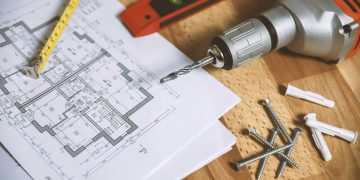
Pre-Installation Planning
Effective planning is the foundation of a successful SIP install. First, make sure the job site is level, accessible, and clear of debris. If panels need to be craned in, you'll also need overhead clearance.
You'll work closely with the architect, SIP manufacturer, and general contractor to finalize panel layouts. Everything must line up, including electrical paths, plumbing routes, window sizes, and load calculations. Any mismatch at this stage will cause delays later.
SIPs are factory-cut, so there’s no room for guesswork once they hit the job site. Every mistake in your blueprints shows up in the panels. Double-check dimensions, wall heights, and opening placements. Precision now avoids costly fixes down the road.
When selecting a supplier, especially if you plan to order online, make sure their panels offer verified insulation ratings. Early choices like this can make a big difference in long-term energy efficiency and comfort.
Delivery and Handling of SIPs
Delivery day comes with a semi-truck full of bulky, pre-cut panels. You’ll need plenty of space for staging and easy access for unloading. A forklift or crane may be necessary, especially if you're working with large roof sections or heavy bundles. Plan ahead so that the equipment and crew are ready when the truck arrives.
Once the panels are on site, store them flat on a clean, dry, and level surface. Keep them elevated off the ground using pallets or blocking to prevent moisture absorption. If there’s any chance of rain, cover the panels completely with tarps or breathable protective wraps to shield them from the elements.

Handle each panel with care, especially around the edges. Even a small dent or chip can affect how panels fit together during installation. Avoid leaving them exposed to direct sunlight or moisture for long periods, as this can compromise both the surface and insulation quality. Quick, careful handling helps maintain performance and ensures smoother installation later on.
Foundation Requirements
Your SIP installation is only as good as the foundation it sits on. If it's not square and level, expect major issues during panel alignment.
Here’s what you’ll need:
- A flat surface with tolerance within 1/8 inch over 10 feet.
- Proper anchor bolts or plates to secure the first row of panels.
- Vapor barriers and termite shields, depending on your location.
Some installers use treated bottom plates or sills. Ask your SIP provider what's standard for your region.
Panel Layout and Numbering
Each SIP arrives labeled and pre-cut for a specific location in your structure. The layout is carefully engineered, and every panel is designed to fit in a particular spot. Think of it as assembling a precise structural system where the order matters. Accuracy here sets the tone for the rest of the build.
During installation, match each panel ID to the layout plan provided by the manufacturer. Follow the numbering sequence step by step to avoid confusion or misalignment. Keep unused panels protected and organized so nothing gets damaged or installed out of order.
Getting this part wrong can create gaps, delays, or structural issues. That’s why a short planning walk-through with your team before installation starts is so valuable. A few minutes of coordination on-site can save hours of troubleshooting later.
Wall Panel Installation
Once the foundation is ready and panels are staged, the wall installation begins. Precision at this stage is critical for structural integrity and long-term performance.
Follow these key steps:
- Position the first corner panel. Get it plumb and square, since it sets the tone for everything that follows.
- Attach with fasteners and splines. Use long screws, structural connectors, or cam locks based on your panel system.
- Seal every joint. Apply SIP tape, mastic, or expanding foam as specified by the manufacturer.
- Install one panel at a time. Check alignment as you go. Use a laser level or string line to maintain consistency from start to finish.
Taking it slow and steady at the beginning pays off. A well-set first row creates a smooth path for the rest of the structure.
Electrical and Plumbing Considerations
This part surprises a lot of first-timers. SIPs don’t behave like stick framing when it comes to routing wires and pipes. Poor planning here leads to frustration later, so think ahead and stay within the system’s limits.
Here are four important considerations to account for before installation begins:
- Built-in electrical chases: Most panels come with factory-installed conduits to accommodate typical outlet and switch runs.
- Limits on panel modifications: Cutting large holes through the foam core can weaken the structure and void warranties.
- Design constraints for system integration: Mechanical systems, including HVAC and plumbing, must be designed with panel restrictions in mind.
- Timing of trade coordination: Electricians and plumbers need access before walls are closed up. Retrofits are difficult and expensive.
Addressing these details early prevents unnecessary rework and helps keep your project on schedule.
Roof Panel Installation
Installing SIP roof panels is more complex than wall installation. They’re larger, heavier, and must be set accurately along sloped roof framing.
To ensure efficient installation, follow these steps:
- Use lifting equipment for safety. A crane or boom lift is typically needed to position large roof panels, especially on multi-story structures or steep roof pitches.
- Confirm ridge beam and truss placement. Structural supports must be level and correctly set before panels go in. Inaccuracies here will throw off the entire roof plane.
- Fasten, seal, and support joints. Secure each panel as you go, then seal and tape the seams. Use blocking under overhangs to prevent sagging or movement.
A well-aligned and sealed roof base supports stronger finishes and better energy performance throughout the structure.
Inspection and Code Compliance
Before drywall goes up, most states require a building inspector to approve the SIP installation. Panels usually pass inspection with no issues, as long as they’re installed according to code and manufacturer guidelines.
Inspectors typically check for proper anchoring, fire blocking, labeled electrical chases, and moisture control features like vapor barriers. These are essential for safety and building performance.
Your SIP provider should offer code documentation to support the project. Ask for compliance letters or technical reports early to avoid delays during inspection.
Finishing Touches
Once the panels are installed and approved, finishing work begins. SIPs make this phase straightforward by blending easily with standard materials.
Trim any foam that extends past seams or openings. Drywall attaches directly to the surface of the OSB panel, and windows and doors are flashed and finished like in any traditional build.
Since the panels are already insulated and load-bearing, you can skip steps like batt insulation, house wrap, and extra framing. This saves time and simplifies the overall process.
Timeline and Labor Expectations
SIP builds move quickly compared to traditional framing, but they still require the right crew and coordination. Here's a general breakdown of how long each phase may take:
- Wall panels: 2 to 3 days with a 3- to 4-person crew
- Roof panels: 1 to 2 days, depending on panel size
- Sealing and detailing: 1 to 2 additional days for taping, foaming, and final checks
Delays can happen due to weather, missing tools, uneven foundations, or incomplete plans. A little flexibility goes a long way in keeping the build efficient and stress-free.
Troubleshooting Common Challenges
Even experienced builders hit bumps with SIPs. The key is knowing what to expect.
- Misaligned panels: Loosen fasteners, adjust, and recheck the foundation.
- Water exposure: Dry panels thoroughly, reseal, and inspect for damage.
- Crushed foam or bent OSB: Call the manufacturer. They may recommend patching or replacement.
Don’t force panels to fit. That creates bigger problems later. Pause, reassess, and lean on your SIP tech rep if needed.
Why Professional Installers Make a Difference
DIY SIP installs are possible, but they come with real risks. Most problems stem from poor preparation or improper sealing. Professional installers bring the right tools, safe handling techniques for large panels, and a solid understanding of proper joint alignment.
Look for certified installers, check reviews, and ask for references to ensure you're working with a reliable crew.
Final Thoughts
Installing structural insulated panels can change the way you build, but only if it’s done right. The learning curve may be steep at first, but once you’ve done it, they make construction faster, cleaner, and more efficient.
If you're thinking about using SIPs in your next building design, ask the right questions early and work with people who know the system well. It’s a smart move that pays off long after the panels go up.
Check Our Best Selling Products:
- Ashley Furniture Boxmere Leather/PVC Power Reclining Sofa
- NARBUTAS Choice 3H Office Cabinet w/Lock, Width 39.3"
- Beverly Hills Furniture Flora Leather Sofa Chaise
- NARBUTAS Motion 70.8" Electric 3 Columns Adjustable Office 2-Desk Bench w/One Open Metal Leg
- Furniture of America Elana Wood Extendable Dining Table


